- Duralawn
- Artificial Grass Products
- Artificial Grass Putting Greens
Artificial Grass Putting Greens
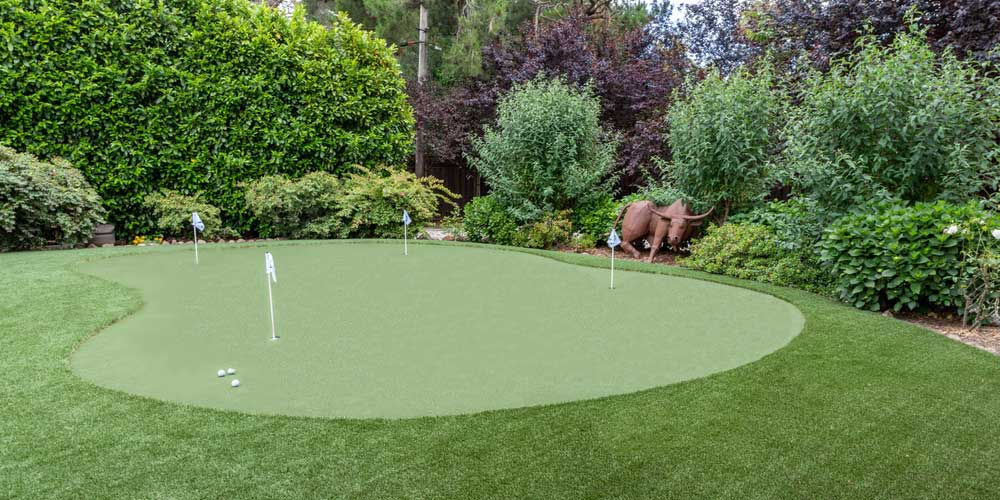
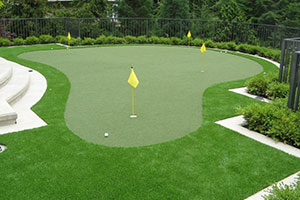
Artificial grass putting greens are a great way to enhance your backyard with a realistic golf experience that'll improve your golf game or entertain your children or grandchildren for hours. There's no easier way to reduce your handicap with the convenience of being steps away in your own backyard. Whether you want to practice a short 3 foot putt or your short game approach you can enjoy your own realistic artificial grass putting green in almost any size yard by incorporating it into your existing landscaping.

At Duralawn® we will work with you to create a custom designed putting green with unique undulations and elevation changes along with hole positions that are both challenging and aesthetically appealing. The ultimate goal is to create a putting surface that suits your vision while creating the most realistic experience possible. Artificial grass putting greens are incredibly low maintenance so you'll have even more time to practice.
In this article we are going to go over everything you need to know about artificial putting greens including cost and maintenance including a guide below on how to build an artificial grass putting green from scratch. Whether you enjoy the do-it-yourself approach or you would just like to know what's involved in creating a professional backyard putting green, you will find the following information very helpful.
Artificial Grass Putting Green Cost
How much does an artificial grass putting green cost? At Duralawn® we take pride in providing the absolute best in quality and workmanship with all of our custom putting greens. The average golf practice putting green costs between $18 and $24 per square foot which includes the site preparation, custom design, professional installation and necessary hardware. This includes cups and flags so you can start using your new practice golf green right away.
Site Preparation
Site preparation and accessibility are important factors when determining cost for artificial grass putting greens. The equipment and materials required to create the putting green need to be moved in and out of the site. If manual labour is required to move materials for a property with limited access in place of large machinery, the labour costs will be higher. Other factors that affect the price include grading, material removal, retaining walls and ornamental rock features.
Custom Design
Designing a realistic, tour-quality putting green is an intricate and precise art in which we take tremendous pride in doing the right way. The design needs to incorporate drainage, existing landscaping and aesthetics while most importantly, maintaining the vision of the customer. After all, you will be the one enjoying the putting green for many years. We will put together a design based on years of experience in the landscaping and golf industry that we can be proud of and you can take pride in owning.
Professional Installation
A high-quality, professionally installed artificial grass putting green requires expertise, knowledge of golf and attention to detail which we guarantee with all of our custom greens. Our installation specialists use the best products in the industry so you can be assured of the quality, durability and low-maintenance of your new green. We don't cut corners and that shows in our work and the numerous satisfied customers we have enjoyed working with over the years.

Artificial Grass Putting Green Installation Guide
Artificial grass putting greens can be installed almost anywhere outdoors and even indoors with a prefabricated kit. Whether you want to learn more about the installation process or you want to tackle the job on your own, we can help. If an outdoor golf putting surface is on your horizon be sure to read our step by step process below. Our professional installation team can work with you to build your dream putting green by filling out the contact form below or giving us a call.
Equipment and Materials Required for Installation
- Marking spray paint
- Measuring tape
- Flat head shovel
- Landscaping rake
- Olfa blade
- Top cutter blade
- Hammer
- Mallet
- Level
- Wheelbarrow
- Plate compactor
- Extraction hole cutter
- Drop spreader
- Push broom
- Shop vacuum
- Backpack blower
- Crusher chips
- Putting green turf
- Artificial grass
- Seam cloth
- Outdoor glue
- Nails
- Sand
1. Location and Size
The first step is to decide where the putting green will be located. You want to keep in mind your existing landscape when determining the size of the green and fringe area. The goal is to come up with a putting green surface and fringe area that suits both your vision and budget. The putting green turf is manufactured on 15' wide rolls and you want to incorporate that into the design as much as possible for the highest efficiency.
After you have decided on a location for your new putting green you should mark the area with spray paint to get a visual of how it's going to look. This is when you should have a good idea of the green size and how you want the fringe to wrap around. You can incorporate a narrow fringe around the green or run the putting surface up against an adjacent large area with artificial grass to have an even larger area to chip from. This is where you can be as creative as you'd like and work together with the green designer.
2. Base Preparation
The base preparation is the most labour intensive part of building artificial grass putting greens. The goal is to remove all the organics to a depth of 4-6" from the area that will receive the crush, putting green and fringe. After the organics are removed it's time to move the crush so it can be shaped into a world class putting green. The designer will incorporate elevation changes and subtle undulations while keeping in mind drainage and the existing landscape.
After raking and getting a rough idea of the lay of the green, fringe and surrounding area, the gravel will get packed down to ensure the ground base is solid and formed correctly. This is when the ground layer can be tweaked to get just the right slope for your putting surface. The crusher chips contain a mixture of rock and sand, the type of rock used will depend on where you purchase the crush. If the crush has a low level of sand we recommend using crusher fines to work the top layer so you can create a smooth surface.
The crush should be sprayed down with a garden hose before packing and the process should be repeated at least 2 or 3 times. As the crush dries out it hardens and is worth taking the extra time so you get a base that's solid, won't settle over time and will hold the spikes in properly.
3. Roll Out Putting Green
Once you are happy with the sub layer it's time to roll out the putting green. This should be done gingerly so you avoid disrupting the ground as much as possible. The tiny rocks that make up the crusher chips can easily get dislodged when walking on the base. These rocks can end up being noticeable through the putting green and will need to be pressed with a tamper or weighted roller later on.
The putting green turf should be placed to maximize efficiency and then cut to the required shape. This is easiest to do with a top cutter blade found in a carpet supply store. Keep in mind that you will need to incorporate a fringe and any other features you have in the overall putting green design plan. Once the green is cut and in place, it's time to trim and place the fringe or adjacent artificial grass area that will run up to the perimeter of the green. This step is time consuming and requires precise cuts to create a clean transition between the fringe and putting green.
4. Hole Placement
The placement of the holes is an important part of installing artificial grass greens. The elevation changes and subsequent roll of the ball should be carefully thought out at this point. You want to create a mixture of challenging and simple putts. This is where communication with the owner is important so you can create a putting green that suits the owner's ability. An average 15' x 30' putting green should have 3-4 holes for both functionality and aesthetics.
An extraction hole cutter is ideal for this step. It allows for precise hole cutting and prevents dipping or mounding around the cup that creates an unnatural and untrue putting surface. The best method is to roll a corner of the green up and cut one hole at a time to prevent disturbing the sub layer as much as possible while keeping the green in its original placement. After the holes are dug out, place the cup sleeve into the hole making sure it's level and snug. Crusher fines are great for creating a smooth surface around the hole.
5. Seaming Cloth and Glue
Everywhere you have a seam, whether its the edge of the green where it meets the fringe or where the fringe is pieced together you need to apply seaming cloth underneath. It can be affixed to the ground sub layer with nails to keep it in place during gluing. When all the cloth is in place it's time to glue by working clockwise around the green. The glue sets fast, especially in warm weather and you don't want to glue the entire green at once. Start at one area and work your way clockwise in small segments depending on how fast the glue is drying.
As the glue is drying it's time to secure the putting green and fringe with 5-6" spikes. The spikes should be spaced every 4-6" paying special attention to seams and corners that are most prone to pulling up. After the glue has dried and the fastening spikes are all in place you should do a final check for missed areas before applying the sand infill.
6. Infill and Broom
A 20/40 infill should be applied to the green with a drop spreader to ensure even placement on the entire green surface. Infill is important to create a realistic putting experience and improves the longevity of the turf. Add about half of the infill and brush it into the green by pushing against the grain with a stiff bristle broom until the sand isn't visible. Now add the rest of the sand evenly and brush it in again using the same brooming technique to sink the sand into the base of the putting surface. The fringe requires a 50/100 infill which we recommend installing after the putting green surface has been completed.
After the infill sand is applied to the green surface we recommend giving it a try, you can increase the ball roll speed by adding more sand.
7. Final Inspection
The last step to building an artificial grass putting green is the final inspection. Ensure that the edges are spiked and no corners lift up around the edge of the green and along the seams of the fringe turf. There shouldn't be any sand visible and no debris left on the green. A backpack blower is a great tool to use to both sink the infill sand and also to clean the green off. It's a great idea to purchase a blower to keep the green clear of debris throughout the year. It only take a few minutes to blow off leaves and other debris that can end up on the green surface. Place the flag and pins into the holes and give it a try!
Artificial Grass Putting Green Maintenance
How do you maintain and clean an artificial grass putting green? Maintaining artificial grass putting greens is similar to maintaining artificial grass lawns and is extremely easy. A professionally installed artificial grass putting green will have sand infill in the turf to create a realistic putting experience. You should never vacuum a putting green because you will be removing infill sand that is vitally important to the putting surface. Use a backpack blower or something similar to remove small debris that can end up on the surface over the summer.
We recommend using a quality tarp or cover to keep debris off the green in the winter or when it isn't being used for an extended period of time. Rain and snow won't harm the surface but a mixture of water, snow and organic materials like leaves can rot and end up falling between the grass fibres. Over time the organic materials can accumulate and affect the putting surface, start to smell and even harbour moss or weeds. If your putting green is in an area that receives organic debris from nearby trees or bushes we recommend using a quality tarp or a custom pool cover cut to fit the putting green.

Artificial Grass Putting Green FAQs
If you've read this article and still have questions you might find answers below in our artificial grass putting green FAQs. These are common questions we get asked but if you still have questions we'd love to hear from you.
How much does a backyard putting green cost?
How much does a backyard putting green cost?
The simple answer is between $18 and $24 per square foot depending on the type, design, features and site accessibility. A lot of homeowners also incorporate artificial grass either surrounding the green or in an adjacent area which costs between $10 and $14 per square foot.
How do you put a putting green in your yard?
How do you put a putting green in your yard?
The process for installing a putting green in your yard is quite extensive. It takes a lot of time, knowledge and the right equipment to do it properly. If you install the green yourself we recommend reading our installation guide above. If you want to hire a professional artificial grass putting green installer to complete the work give us a call and we can provide a free written estimate.
What grass is used for putting greens?
What grass is used for putting greens?
Natural putting greens that you would find on tour at a professional golf course use either creeping bent grass in moderate to cool climates and bermuda grass in tropical climates. These grasses are ideal because they are durable and function well when cut at short lengths. Artificial putting greens use nylon grass that mimics the real thing so closely you might not even notice the difference.
How do you clean an artificial grass putting green?
How do you clean an artificial grass putting green?
It's really simple. You should never use a vacuum or anything that might remove the sand infill. A blower or backpack blower should be used to remove debris and keep the surface clear and free of dirt and debris. A bristle broom or power broom with a rotating head is recommended if you notice the green blades flattening out in high traffic areas. Push against the grain to stand the blades up as often as needed.
Best Artificial Grass Putting Greens
At Duralawn® we use the absolute best putting green products on the market today. Our warranty is second to none and our professional installation guarantees a product that is going to last a long time and look amazing. The best artificial grass for a putting green is made of nylon that will stand up to extensive wear as well as provide a true putting surface. Visit our artificial grass products page for our list of quality grasses including putting grass designed for the climate and extreme weather in the Okanagan Valley.
Disclaimer
Please use all appropriate and proper safety precautions when attempting projects on this website. All projects are attempted at the reader's own risk.
Duralawn® participates in the Amazon Services LLC Associates Program, as an Amazon Associate we may earn a commission from qualifying purchases.
Duralawn® artificial grass installations, products and service in Kelowna, Vernon, Penticton, etc since 2018.


