- Duralawn
- Artificial Grass for Dogs
- Artificial Grass for Dogs Installation
Artificial Grass for Dogs Installation
A pet friendly artificial grass installation is important for creating a long lasting play or living area for your dog. When all the proper steps are taken when installing the grass, you and your dog will be able to enjoy soft luxury for years with grass that's in tip-top shape. You'll learn how to protect your financial investment from premature damage or wear and protect your dog with some handy tips from our installation professionals that have countless years of experience with pet turf.
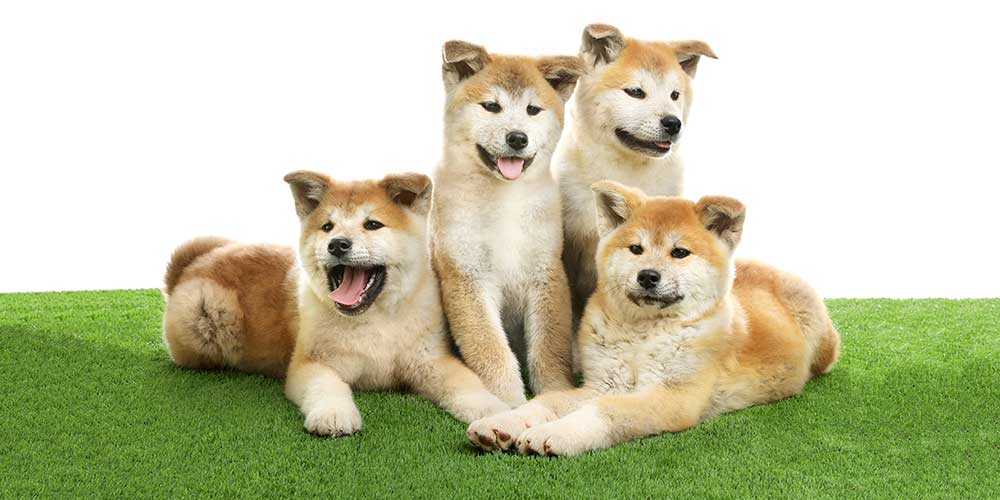
Dogs love artificial grass. It's likely a combination of how soft it feels on their paws and the predictability of their footing on a consistently clean surface. If you ask any dog trainer or kennel owner about using fake grass instead of natural grass (or mud) you're likely going to hear praise and often a regret that they didn't switch sooner. In addition to the many benefits of artificial grass you'll be spending a lot less time maintaining your new grass and spending more time with your dog.
9 Steps to Artificial Grass for Dogs Installation
Installing artificial grass properly in an outdoor setting with an expectation that it will last in some cases beyond 25 years requires planning and careful attention to detail. This guide to laying artificial grass or dogscaping will take you through the necessary steps to achieve a long lasting, high performing and safe area. These guidelines will help you prevent early material wear that'll shorten the life of the turf and persistent urine odour that'll be really tough to get rid of once it's there.
Tools and Materials Required for Preparation
- Wheelbarrow
- Shovel
- Rake
- Sod cutter (optional)
- Hammer
- Saw
- Plate compactor
- Garden hose
- Edger board
- Stakes
- Screws
- Crusher chips
- Weed barrier fabric (optional)
1. Remove Existing Material
The goal of the site preparation stage is to remove any organic material from the area that you want to place the grass. This commonly involves removing damaged, drying or dead natural grass and about 3 inches of soil below the grass. You want to create a depth cavity that will allow you to pack 4 to 5 inches of crusher chip gravel that will act as the sturdy sub layer with a high drainage rate.
The grass, dirt, rocks or whatever you are removing is easiest to remove using a wheelbarrow or pull cart. The size of the job might dictate that you will want to use machinery for material removal with access and budget in mind. Skimping on the removal portion and not getting down the required 4 to 5 inches could potentially lead to an inadequate sub layer that will allow weeds to flourish or fail to provide enough drainage. Drainage is especially important for dog owners because it will help flush urine through the grass, and into the sub layer to be washed away.
If you run into any obstacles like stubborn tree stumps you may need to get creative or hire a professional to deal with it. A simple capping of existing sprinkler heads may be required or you may want to just completely shut the irrigation system down if you won't need it. Always be careful when digging and if you are in doubt call a professional.
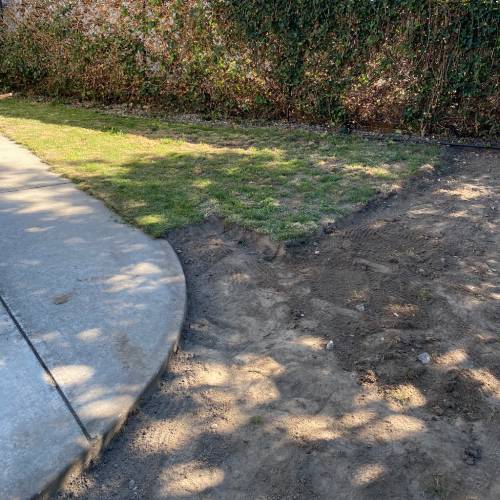 Artificial grass base prep begins with removing organics; grass, dirt and debris down about 5 inches.
2. Edging Placement
The importance of edging around artificial grass can't be stated enough especially when dogs will be using the grass. The benefit is twofold, firstly the edging can act as a backing material to fasten the grass to along the edges. It's rare for a dog to try to pull the grass up but preparing for the worst is always a good thing. An ideal edger is made out of synthetic plastics or metal. The other benefits to an edger board are that it will prevent weed penetration from adjacent substrates and prevent erosion.
The edge of the grass is typically fastened with 5 or 6 inch spikes, which we will go over below. Once the infill material is spread on the grass, it should cover the nails that are sunk into the base out of sight. If this is done properly the stakes should not be able to pulled out by even the most ambitious dog.
You may not need an edger along all sides of the new grass area if you have an existing concrete walkway, driveway or patio slab. You may also want to use a perimeter fence as a barrier but keep in mind that you want to try to stop roots from crossing to where the grass is placed to prevent things like bindweed.
3. Place Crusher Chip Base
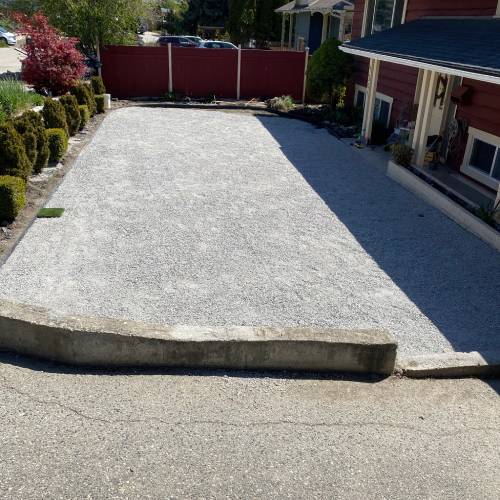
The best sub base for artificial grass with dogs are 3/8 inch or smaller crusher chips mixed with sand. The amount, measured in cubic yards or meters is roughly one yard per one hundred square feet area to be covered to a depth of 3 inches. Spread the crush out evenly with a grading rake to about half an inch above your required grade.
1 cubic yard (meter) = 100 square feet coverage at a depth of 3 inches
You'll want to incorporate the height of your grass blade which will likely range from 1 to 2 inches. If the grass blade is 2 inches long your goal is to have a packed sub base approximately 2 inches below where you want the top of your grass to sit. In the finished product the typical height that grass blades extend above concrete or border edges is 1/2 to 3/4 inches.
4. Level and Pack Base
This step takes a keen eye for detail and a bit of patience, and is also the last step of preparation. The crush should be levelled as best as possible with a grading rake (wider the better) with special attention to the edges. Ensure that the crush is packed adequately along every edge as this becomes important when fastening the spikes. If the crush isn't packed, it loses it's grabbing and holding ability which could lead to the nails being pulled out.
The process of packing crush with a vibratory plate compactor is a simple. Get the crush damp, but not so wet that puddles form and pack. Allow the crush to dry completely and repeat the process of wetting, packing, allowing to dry at least twice. The angles, undulations and imperfections will be surprisingly evident in the final product so attention to detail is important at this step of the process. Aim for a crown or consider drainage in the overall slope of the area to ensure optimal drainage.
A sub base that's packed properly and at least 5 inches of depth will really benefit dog owners down the road. The sub base will provide a sturdy backing for the grass which will increase the lifespan of the turf by reducing premature wear. The fastening spikes will hold almost as good as hammering into wood if the gravel is packed adequately which means that no dog will ever have a chance at pulling the grass up along the edges.
Tools and Materials Required for Installation
- Utility knife
- Carpet kicker
- Broadcast spreader
- Push broom
- Power brush (optional)
- Blower (optional)
- Vacuum (optional)
- Weed barrier fabric (optional)
- Artificial grass
- Seam tape or glue/cloth
- Spikes or nails
- Synthetic infill
5. Weed Barrier Fabric (Optional)
An optional step is to add a weed barrier fabric between the crush sub base and the artificial grass. While this step is considered necessary by some, it's deemed overkill by others but we can take a logical approach by considering the following questions. You should then be able to make a more informed decision for yourself about whether or not you want to use a weed barrier fabric.
- Is the sub base crush layer at least 5 inches deep and packed adequately?
- Are you using an edger system that's at least 5 inches deep to prevent traversing weed roots?
- Is your neighbourhood prone to weeds?
- Are you willing to spend a bit more money and a bit more time for the added peace of mind?
The upside to using it is you can be sure that you won't have any weeds growing from under the lawn but it does require some extra time and financial investment. Cut the fabric to size and place with the appropriate clips to hold it in place ensuring that you overlap along seams and hold snug to all edges for optimal weed prevention.
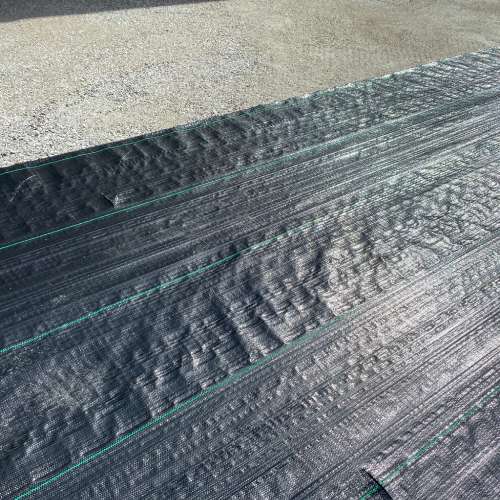 A weed barrier can be installed on top of the crush layer for added assurance that no weeds will penetrate.
6. Place and Trim
Your grass should be of high quality and designed for dog usage. Place the grass being careful not to disturb the sub layer as any rocks that are disturbed will show in the finished product. You may need to hand tamp any areas of the base that are disturbed during this step if you are maneuvering with large and heavy rolls of turf. If you are installing on a hot day the grass will flex quite easily but if not, you should stretch the grass with a carpet kicker before any gluing of seams or spiking.
Line up the grass so that there is overlap over edges and your seams are lined up. The grass will have a noticeable grain direction when it's new so it should be easy to ensure that the grain direction is consistent if you are working with multiple pieces of grass. The goal is to cover every inch of the area in preparation for trimming along all edges by stretching first and then trimming.
7. Glue and Spike
The next step is to attach the seams with outdoor rated adhesive or tape, if necessary. The seam gap should mimic the natural gap in the grass that can be seen by looking at the width of the gauge rows on the artificial grass backing. Typically this gap is about 1/4 inches but it can be as small as 1/8 inch in some products.
After the seams are glued and allowed to dry you can set up for spiking the perimeter. We recommend using 6 inch artificial grass nails along all seams for added holding power. This step is even more important when dogs will be using the grass for play or training. Along the edges of the grass area a general rule is to space the nails 6 to 8 inches apart, and about 1 inch in from the edge. You want the nail to grab and fasten the edge of the grass without it being so close to the edge that it bends the grass down into the substrate.
If you are being extra cautious or you are dealing with an ultra aggressive dog that's ripping at the edge of the grass you may want to consider attaching the grass to the edger material, adjacent deck, perimeter fence, etc. This should be done carefully with screws, as not to damage the artificial grass backing, while still providing enough grab to prevent being pulled out.
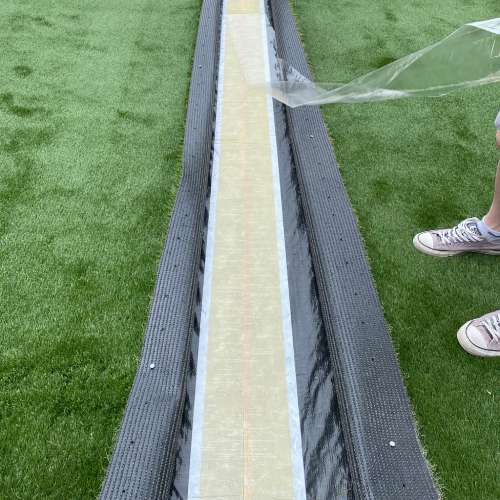 A quality commercial grade artificial grass seam tape is a great "no-mess" option for securing two grass pieces together.
8. Apply Synthetic Infill
This step is important for dog owners. Typically an artificial grass infill consists of sand or specifically kiln dried silica sand but we don't want to use just regular silica sand. The reason is that sand will, over time, develop and harbour bacteria that's introduced when dogs urinate and/or poop on the grass. This leads to two issues, the smell of the bacteria in dog urine will intensify over time and the bacteria just isn't ideal for pets and/or children that are enjoying the grass.
You want to apply an antimicrobial infill at a rate usually of one pound per square foot. This is done most evenly with a broadcast fertilizer spreader on a dry day. The goal is to distribute the infill as evenly as possible over the entire area, paying special attention to high traffic areas or areas where you think dogs might frequent to pee or poop. The cost of synthetic infill is higher but worth every penny in the long run because you won't have to deal with the smell of urine or need to apply a synthetic grass cleaner as often, or at all.
9. Brush
This is the final step to our artificial grass for dogs installation guide and the most rewarding. An artificial grass power brush makes it super easy, and fun but a regular push broom will also do the trick with a bit of elbow grease. The goal is to sink the infill into the grass and make it disappear by pushing the broom against the grain of the grass. This technique is called blooming and in the process of pushing against the grain you are forcing the blades to stand up straighter, placing the infill sand and making the grass more resistant to wear.
Your grass should look amazing now and be ready for you and your dog to enjoy for many years!
Disclaimer
Please use all appropriate and proper safety precautions when attempting projects on this website. All projects are attempted at the reader's own risk.
Duralawn® participates in the Amazon Services LLC Associates Program, as an Amazon Associate we may earn a commission from qualifying purchases.
Duralawn® artificial grass installations, products and service in Kelowna, Vernon, Penticton, etc since 2018.
